
Forms are elements that allow the user to type in and send it to the web server, which affects the state of the application. In this way, the flow of data is going from the browser to the server.
Example:
<!DOCTYPE html>
<html>
<head>
<title>HTML elements - forms</title>
<meta charset="UTF-8"/>
<meta name="description" content="This page is about HTML element forms" />
<meta name="keywords" content="html elements, html froms, forms" />
<meta name="author" content="Marija Rikic">
<link rel="icon" type="image/png" href="images/favicon.jpg">
<link rel="stylesheet" type="text/css" href="css/style.css">
<script type="text/javascript" src="js/script.js"></script>
<!-- JavaScript that is inserted directly on the page -->
<script type="text/javascript">
</script>
<noscript>Your browser does not support JavaScript</noscript>
</head>
<body>
<form action="demo_form.php" method="post"
enctype="multipart/form-data"
autocomplete="on" novalidate>
<!-- data entry fields -->
<button type="submit">Send</button>
</form>
</body>
</html>
Result:

The essential attributes of form are action and method, with them you can define on what URL on the server will be send data from the form and what type of HTTP request will be used (GET or POST).
Elements of form can be text fields, lists for checking several options, lists to select one of the options (radio buttons or drop-down list) and other.
Example 2: a typical form for user login.
<form action="login.php">
Username: <input type="text" name="username" />
Password: <input type="password" name="password" />
<button type="submit">Confirm</button>
</form>
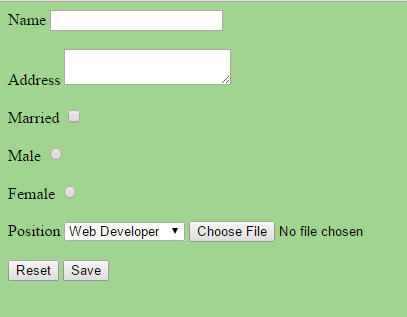
Example 3: form with different input fields.
<form name="upload_resume" action="send.php" method="post">
Name: <input type="text" name="username" /><br /><br />
Address: <textarea id="address" name="address"></textarea><br /><br />
Married <input type="checkbox" id="married" name="married" /><br /><br />
Male <input type="radio" id="male" name="sex" /><br /><br />
Female <input type="radio" id="female" name="sex" /><br /><br />
Position <select>
<option value="web developer">Web Developer</option>
<option value="seo specialist">SEO Specialist</option>
<option value="copywriter">Copywriter</option>
</select><br /><br />
Upload resume <input type="file" id="resume" name="resume" /><br /><br />
<button type="reset">Reset</button>
<input type="submit" value="Save" />
</form>
Result:

Radio buttons are used to offer the user several options, where you can select only one. Checkbox list allows the user to select multiple options simultaneously. In both groups of options, it is important to have the same value of name attribute in order to be taken as part of the same group (for example, name="sex" for the radio options from example 3). The field type file allows uploading the file that will, after confirmation of entry form, be sent to the server. Button can be presented using the <button> element, which can be of the type:
In the HTML5 version can be applied a large number of field types for <input> elements, such as color, date, datetime, datetime-local, email, month, number, range, search, tel, time, url and week.
Example 4: Form with special types of fields.
<form>
Color: <input type="color" name="color" /><br /><br />
Date: <input type="date" name="date" /><br /><br />
Date/Time: <input type="datetime" name="datetime" /><br /><br />
Month: <input type="month" name="month" /><br /><br />
Week: <input type="week" name="week" /><br /><br />
Number: <input type="number" min="1" max="10" step="2" /><br /><br />
Range: <input type="range" min="10" max="100" step="2" />
</form>
Result:


Note: these types were introduced only in the HTML5 specification so that they are not supported in all browsers. Most types are supported in Chrome, Opera and Safari, while Internet Explorer and Firefox do not support most of these types.
HTML5 has a list of data which can be added to the text field, <datalist>. They make it possible to easily implement a text box where the user can select one of the predefined values while tyoing text (autocomplete)
Example 5: datalists.
<input list="libraries" />
<datalist id="libraries">
<option value="jQuery"></option>
<option value="MooTools"></option>
<option value="Dojo"></option>
<option value="YUI"></option>
</datallist>
Result:

Labels are HTML elements that contain the names of the form fields. Each label is associated with some fields in form; when you click on it, some action is executed on the field that depends on the type of field.
For example,
Example 6: the label fields.
<form id="form" action="upload_resume.php" method="post">
<label for="name">Name</label>
<input type="text" id="name" name="name" /><br /><br />
<label for="address">Address</label>
<textarea id="address" name="address"></textarea><br /><br />
<label for="married">Married</label>
<input type="checkbox" id="married" name="married" /><br /><br />
<label for="male">Male</label>
<input type="radio" id="male" name="sex" /><br /><br />
<label for="female">Female</label>
<input type="radio" id="female" name="sex" /><br /><br />
<label for="position">Position</label>
<select id="position">
<option value="web">Web Developer</option>
<option value="seo">SEO Specialist</option>
<option value="writer">Copywriter</option>
</select>
<input type="file" id="resume" name="resume" /><br /><br />
<button type="reset">Reset</button>
<button type="submit">Save</button>
</form>
Result:

Note: the labels are extremely important elements in cases where the form has to be accessible to people who do not see well. A large number of applications that read elements on the screen (screen readers) use just labels to inform users about the name of the element. If you do not set a label with valid for attribute, visually impaired users will have problem
recognizing elements to enter.
Complete code used in examples.
Example:
<!DOCTYPE html>
<html>
<head>
<title>HTML elements - forms</title>
<meta charset="UTF-8"/>
<meta name="description" content="This page is about HTML element forms" />
<meta name="keywords" content="html elements, html froms, forms" />
<meta name="author" content="Marija Rikic">
<link rel="icon" type="image/png" href="images/favicon.jpg">
<link rel="stylesheet" type="text/css" href="css/style.css">
<script type="text/javascript" src="js/script.js"></script>
<!-- JavaScript that is inserted directly on the page -->
<script type="text/javascript">
</script>
<noscript>Your browser does not support JavaScript</noscript>
</head>
<body>
<form action="demo_form.php" method="post"
enctype="multipart/form-data"
autocomplete="on" novalidate>
<!-- data entry fields -->
<button type="submit">Send</button>
</form>
</body>
</html>
Result:
The essential attributes of form are action and method, with them you can define on what URL on the server will be send data from the form and what type of HTTP request will be used (GET or POST).
Elements of form can be text fields, lists for checking several options, lists to select one of the options (radio buttons or drop-down list) and other.
Form fields
The most important elements of the form that user enters the data are fields to input the text, <input> tags. Each input field has a type that determines how the user will enter a value in it. Type of input fields is listed as the value of the attribute type and the most frequently used is text. Type can be adjusted, so that if, for example, if you set the type password, instead of text, when the user enters a character, rather than the character, the dots will be displayed, thereby masking input.Example 2: a typical form for user login.
<form action="login.php">
Username: <input type="text" name="username" />
Password: <input type="password" name="password" />
<button type="submit">Confirm</button>
</form>
Example 3: form with different input fields.
<form name="upload_resume" action="send.php" method="post">
Name: <input type="text" name="username" /><br /><br />
Address: <textarea id="address" name="address"></textarea><br /><br />
Married <input type="checkbox" id="married" name="married" /><br /><br />
Male <input type="radio" id="male" name="sex" /><br /><br />
Female <input type="radio" id="female" name="sex" /><br /><br />
Position <select>
<option value="web developer">Web Developer</option>
<option value="seo specialist">SEO Specialist</option>
<option value="copywriter">Copywriter</option>
</select><br /><br />
Upload resume <input type="file" id="resume" name="resume" /><br /><br />
<button type="reset">Reset</button>
<input type="submit" value="Save" />
</form>
Result:

Radio buttons are used to offer the user several options, where you can select only one. Checkbox list allows the user to select multiple options simultaneously. In both groups of options, it is important to have the same value of name attribute in order to be taken as part of the same group (for example, name="sex" for the radio options from example 3). The field type file allows uploading the file that will, after confirmation of entry form, be sent to the server. Button can be presented using the <button> element, which can be of the type:
- button (simple button that can be clicked)
- reset (button that erases entered data from form)
- submit (the button that sends data from the form)
In the HTML5 version can be applied a large number of field types for <input> elements, such as color, date, datetime, datetime-local, email, month, number, range, search, tel, time, url and week.
Example 4: Form with special types of fields.
<form>
Color: <input type="color" name="color" /><br /><br />
Date: <input type="date" name="date" /><br /><br />
Date/Time: <input type="datetime" name="datetime" /><br /><br />
Month: <input type="month" name="month" /><br /><br />
Week: <input type="week" name="week" /><br /><br />
Number: <input type="number" min="1" max="10" step="2" /><br /><br />
Range: <input type="range" min="10" max="100" step="2" />
</form>
Result:


Note: these types were introduced only in the HTML5 specification so that they are not supported in all browsers. Most types are supported in Chrome, Opera and Safari, while Internet Explorer and Firefox do not support most of these types.
HTML5 has a list of data which can be added to the text field, <datalist>. They make it possible to easily implement a text box where the user can select one of the predefined values while tyoing text (autocomplete)
Example 5: datalists.
<input list="libraries" />
<datalist id="libraries">
<option value="jQuery"></option>
<option value="MooTools"></option>
<option value="Dojo"></option>
<option value="YUI"></option>
</datallist>
Result:
Labels are HTML elements that contain the names of the form fields. Each label is associated with some fields in form; when you click on it, some action is executed on the field that depends on the type of field.
For example,
- if the field of form to which the label applies is a text field or a list, clicking on the label sets the focus so the user can start entering text or to select an item from the list.
- if the form field is radio button or checkbox, it will be selected when you click on the appropriate label.
- if it is the input field for the file, clicking on the label opens dialogue to select the file.
Example 6: the label fields.
<form id="form" action="upload_resume.php" method="post">
<label for="name">Name</label>
<input type="text" id="name" name="name" /><br /><br />
<label for="address">Address</label>
<textarea id="address" name="address"></textarea><br /><br />
<label for="married">Married</label>
<input type="checkbox" id="married" name="married" /><br /><br />
<label for="male">Male</label>
<input type="radio" id="male" name="sex" /><br /><br />
<label for="female">Female</label>
<input type="radio" id="female" name="sex" /><br /><br />
<label for="position">Position</label>
<select id="position">
<option value="web">Web Developer</option>
<option value="seo">SEO Specialist</option>
<option value="writer">Copywriter</option>
</select>
<input type="file" id="resume" name="resume" /><br /><br />
<button type="reset">Reset</button>
<button type="submit">Save</button>
</form>
Result:
Note: the labels are extremely important elements in cases where the form has to be accessible to people who do not see well. A large number of applications that read elements on the screen (screen readers) use just labels to inform users about the name of the element. If you do not set a label with valid for attribute, visually impaired users will have problem
recognizing elements to enter.
Complete code used in examples.
No comments:
Post a Comment
Note: Only a member of this blog may post a comment.